Hey there, if you’ve ever bought an LED emergency light from my team and thought, “Cool, but how do I actually keep this thing working when the power goes out?” — that’s the exact question I get at least three times a week from electricians, building managers, even regular homeowners who grabbed one for their garage. LED emergency lights are low-maintenance by design, but skipping a few basic checks can turn a life-saving device into a paperweight when you need it most. Let’s break this down like we’re chatting over a coffee, no jargon, no overcomplicating stuff. LED Emergency Light
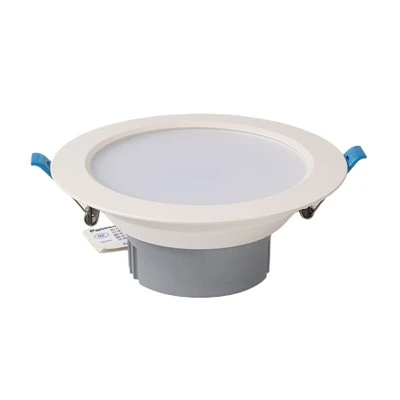
First off, let’s get one tiny myth out of the way: these aren’t “set it and forget it” lights. I’ve had customers hit me up saying their emergency light died in a blackout, only to admit they never touched it after installation. Yep, that’s a real call. The good news is the routine stuff takes 15 minutes max, twice a year. No need for special tools, no hiring a tech (unless it’s for super big commercial systems, but even then, most checks are DIY).
Let’s start with the big one: testing. You’d be shocked how many people don’t know there are two types of tests for LED emergency lights — the quick monthly check and the longer annual deep dive. The monthly test is non-negotiable, and it’s so easy. Every light has that little test button, usually on the back or side, right next to the power indicator. Just press and hold it for 30 seconds. The light should kick on immediately, no flickering, no dimming. If it doesn’t, or it cuts out before 30 seconds? That’s your first red flag. I always tell customers to mark their calendar for the first of every month — set a reminder on your phone, whatever — so you don’t skip it.
Then the annual test, which is way more important. That’s where you hold the test button for the full runtime the light’s rated for. Wait, what’s a rated runtime? Most standard LED emergency lights I supply are 90 minutes — that’s the minimum required by fire codes in most places. If your light only lasts 45 minutes when you do the annual test, that’s a problem. That’s when you know something’s off with the battery, which is the heart of these things.
Speaking of batteries — let’s talk about those, because they’re the #1 reason emergency lights fail. Unlike old incandescent emergency lights that used huge lead-acid batteries, LEDs run on smaller, lithium-ion or NiMH (nickel-metal hydride) batteries, which last longer and hold a charge better. But they still need love. The biggest mistake people make here is leaving the light plugged in 24/7 without ever letting it fully discharge. When you do the monthly test, that’s exactly what you’re doing — letting it run off battery power, not just the wall. That keeps the battery “active,” so it doesn’t die prematurely.
I’ve seen batteries go bad in as little as two years on lights that never got tested, but if you keep up with those checks? You can easily get 5, even 7 years out of a good battery. And replacing the battery? It’s usually a snap — most LED emergency lights are designed so you don’t have to call a pro. Pop off the front cover, unclip the old battery, plug in the new one, snap it back. I always include a little how-to card with every light we ship, and if you lose yours? Just shoot me a message — we send them free, no hassle.
Next up: cleaning and checking for damage. This is the part most people overlook. LED emergency lights are usually mounted in hallways, closets, garages — places that can get dusty, have spider webs, or even get splashed if they’re in a basement or outside. Dust and grime on the lens can dim the light output, so when you test it, it might look like the battery’s bad, but it’s just dirty. For the lens, a soft microfiber cloth (no paper towels, they scratch!) and a little bit of window cleaner works — just make sure the light’s unplugged and off before you do this.
Then check the actual fixture itself. Is it cracked? Is the mount loose? If it’s outside or in a damp area, is there any rust around the base? Even a small crack can let water get inside and fry the wiring. I had a customer last year who mounted his light in his backyard shed and didn’t notice a tiny crack from a falling tree branch — within six months, the wiring corroded and the light died. That was a $15 fix (new fixture) that could’ve been avoided with a 2-minute check every few months.
Wait, what about the power source? These lights are designed to plug into a standard AC outlet, right? But sometimes outlets can go bad. Every few months, wiggle the plug a little to make sure it’s secure. If your light has a power indicator (most do, it’s a tiny green LED on the front), that light should be on when the power is normal. If it’s off and the wall power is on, that means the outlet isn’t working, or the plug isn’t seated right. That’s a quick fix — just re-plug it, or if the outlet’s bad, have an electrician check it, no big deal.
Now, a quick note about commercial vs. residential lights, because I get that question a lot. For my customers with office buildings, retail stores, warehouses — the rules are basically the same, but code might require you to log all your tests. Most of the LED emergency lights I supply have a little built-in test tracking feature, or you can just keep a simple notebook: date of test, how long it ran, any issues. Inspectors love that stuff, and it’ll save you from fines. For residential? You don’t need to log it, but you should still do the tests — your family’s safety is way more important than avoiding a fine.
I also get asked: “Can I leave the light on all the time, even when power’s normal?” No, don’t do that. LED emergency lights are designed to only turn on during a power outage — the constant AC power keeps the battery charged. If you leave the light on 24/7 when the power’s working, you’re draining the battery for no reason, which shortens its life. These lights are built for emergency use, not constant use — use your regular lights for everyday stuff, save the emergency lights for when you really need them.
What about if you have an LED emergency light that’s hardwired instead of plugged in? Those are common for commercial buildings. For hardwired ones, the checks are similar, but instead of testing via the plug, you’ll test by triggering the switch (or using the test button on the fixture). I always recommend that hardwired lights get checked by a licensed electrician once a year, because working with building wiring can be tricky — don’t mess around with live wires if you’re not comfortable.
Let’s talk about common mistakes I see all the time, just so you can avoid them. First, buying cheap replacement batteries. Yeah, they’re cheaper upfront, but they die in a year instead of five. I only supply name-brand batteries with all my lights, and I tell customers to use the same brand when replacing — it keeps the system working right. Second, storing LED emergency lights in a closet or somewhere they’re not easy to access. If you have to climb three chairs to get to it when the power goes out, you’re not gonna test it regularly. Mount it at eye level in a hallway or common area, so anyone can reach the test button.
Another one: not replacing the entire fixture when the battery’s dead. Wait, why would you do that? Because the battery is the most common part that fails, but if your fixture is 10 years old, the LED itself might be dimming. LEDs last super long — like 50,000 hours — so that’s way longer than the battery — but after 10 years, even a good LED can lose output. So if your light is 10 years old and the battery died, it’s better to just get a new one, because it’ll work more reliably than trying to fix an old fixture. I always offer a discount for customers who trade in old units, too — we recycle them properly, no e-waste.
Let’s wrap this up with a quick, actionable checklist you can save: 1. Monthly: Press test button, hold 30 seconds, confirm light works. 2. Every 6 months: Clean lens with microfiber cloth, check fixture for cracks/damage. 3. Annually: Hold test button for full rated runtime (90 mins for most), log results. 4. Every 2-5 years: Replace battery (sooner if it fails a test). 5. Every 10 years: Consider full fixture replacement, since LEDs will start to dim.
Look, I started this business because I hate seeing people panic when the power goes out and their emergency light doesn’t work. These things are simple, but they need a tiny bit of care. If you have any questions about maintaining yours — whether it’s my light or another brand — hit me up anytime. And if you’re in the market for new LED emergency lights for your home, business, or project, we’ve got you covered with options for every space. Just reach out, and we’ll walk through what you need.
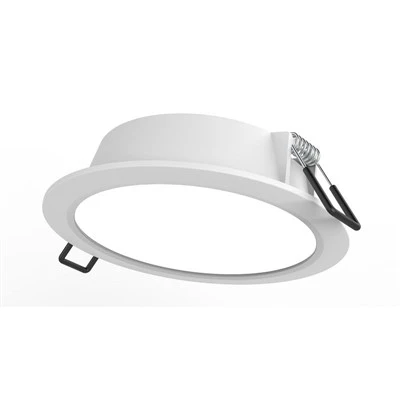
At the end of the day, maintaining an LED emergency light isn’t rocket science. It’s just showing a little attention to something that could save you (or someone else) from a dark, scary situation when things go wrong. Skip the excuses, do the 15-minute checks, and your light will be ready when you need it. That’s the whole point, right?
LED Panel Light References:
- National Fire Protection Association. (2022). NFPA 101: Life Safety Code. Quincy, MA: National Fire Protection Association.
- LED Magazine. (2021). “Battery Maintenance for LED Emergency Lighting Systems.” LED Professional.
- Occupational Safety and Health Administration. (2020). “Emergency Lighting Requirements for Workplaces.” U.S. Department of Labor.
Debesen (Shanghai) Optoelectronics Technology Co., Ltd.
We are one of the most professional led emergency light manufacturers and suppliers in China, featured by quality products and good service. Please rest assured to wholesale advanced led emergency light in stock here and get quotation from our factory. We also accept customized orders.
Address: No.258 Xiucheng Road, Fengcheng Town Economic Development Zone, Fengxian District, Shanghai
E-mail: Debesen258wendy@163.com
WebSite: https://www.debesen.com/
